1) Photoshop Experiments
1.
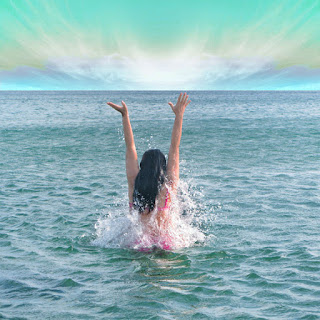
Here, for those images, I have been experimenting with different beginner photoshop techniques; for example, for this first image I have used the 'quick selection tool' to highlight some of the parts of the woman to later on, use the 'curves' from an adjustment layer to control the brightness and contrast of just the woman.
However, after making her brighter, I realised I would like to change her hair back to her original colour 'form' which led me to using the brush
with a colour of black (as the colour black, on the mask, transforms the changes back to its original form).
Secondly, I'v learned to use the 'rectangular marquee tool' to easily select the sky, and use the 'hue/saturation' from an adjustment layer to control its colours and saturation. Additionally, if I click on the "master" mode, I could change it to for example the colour "cyans" and wherever there's a blue colour on the image, that's the only colour that will be manipulated.
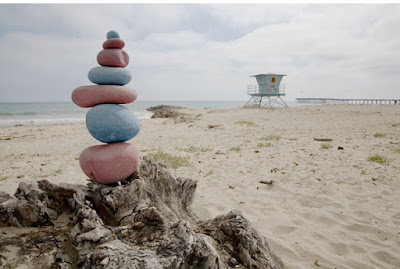
For this next photo, I again have been experimenting with the "curves" from the adjustment layer as the image was too overexposed so I had to make sure it looked as if there really was a day light shining. Next, I realised that because I made the image lighter the sky, in particular the clouds, became too bright, which means I again had to use the brush to make the clouds darker. However, this time I made sure to use the opacity at a lower percentage so that the clouds
wouldn't completely go back to its original form as then, there would be a too visible line between the brighter image and the dark clouds, and that wouldn't look realistic at all. Finally, I changed the colours of the stones, using the quick "selection tool" to select the stones, and to deselect any unwanted parts, I used the "alt" plus "selection tool" as the "alt" is often, such as in this situation, used to take something away, just like the "shift" is used for adding. Then, I just added the colours using the "hue/ saturation" mode.
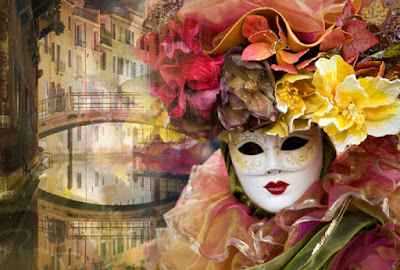
On this image, mostly I've just continued practising what I've learned already but to gain even more knowledge I also learned one more technique, this is used to blend two images together. To do that I had to use the "gradient tool" - once after the "mask" was already added - which then causes the selected part to turn black, which makes it 'disappear' to the mask in a smoother, more transparent action at the 'ages' of the image, depending on the selected place.

Comments
Post a Comment