Posts

Showing posts from September, 2018

4) 2nd Photoshop Creation

Image
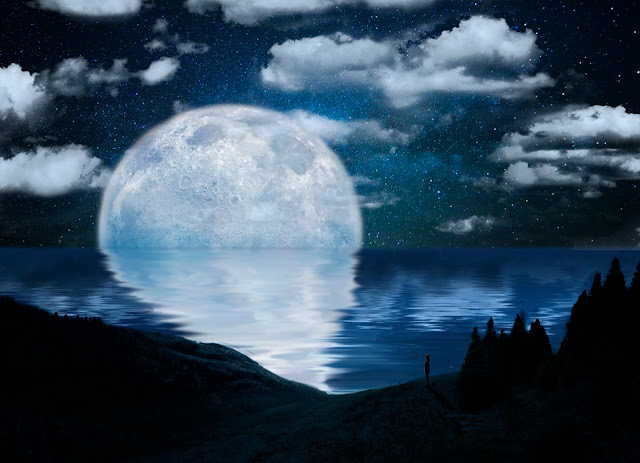
4. My Second Photoshop Creation - "That One Day" Here we have the final outcome. Now, let me go through all the new processes I have learned during this experiment. Just like before, I made sure the new document I've created had a size of 145mm x 105mm and resolution of 300pixels/Inch, as well as made sure that all the pictures I've been choosing to create this image, also had minimum resolution of 2K. This is the first image I have chosen to begin with, I've cut out the ground of this landscape by again, masking the rest of the image typically, using the same tools I've talked about in my earlier work such as, the "magic wand", "quick selection tool" and a "brush". Then I just positioned it in the place I wanted it to be, with the right size using the "free transform" mode.    Then, I chose another image for the water I wanted to add, to make it look like an ocean or a sea. Easily, I again masked the sky fro

3) 1st Photoshop Creation

Image
3. The Very First Own Creation - "Lonely Times" Here is that my firs experiment I've made to learn and keep on training the new learned basics of the Photoshop. Firstly, I have chosen an image from an Internet website and always made sure that the image had its resolution of minimum 2K as it is very important to work using only high resolution photos. Secondly, I created a "New...(document)" _ found in a "File" section - and in options changed the resolution of an image to 300 pixels/Inch. - 300 pixels/Inch is a resolution used for prints - something we can see on a paper or a billboard. - 72 pixels/Inch is a resolution used for digital works such as animation - something we look at through a digital screens such as phones or TV. Also, this time I was assigned to create a postcard of a size 145mm by 105mm, which I can always check in a "Image Size..." that is found under an "Image" icon. Once, I was ready with all the

2) Cutting Out

Image
2. Cutting Out This is the first image taken of me 'sitting' as this is a part and a very beginning of my idea called "Lonely Times". Also, this is a very first step that needs to be learned to be able to move on in learning more of photo-shopping.  During this project, I have gained a lot of new skills and knowledge about techniques and creativity.  Here is the very first cut out I've learned to make through few processes. The first step, as the image was 'raw', I had to manipulate it with all the basic modes such as seen here on the right - allows the image to look more natural and neutral. Second step was to use the "lasso tool" - shortcut for F - to create a rough cut out of everything that is completely un-useful however, cutting something out isn't a good thing to do at all because this means, I'm getting rid of something permanently and what happens if we would like to take it back (?) That's why, instead of a

1) Photoshop Experiments

Image
1. Here, for those images, I have been experimenting with different beginner photoshop techniques; for example, for this first image I have used the 'quick selection tool' to highlight some of the parts of the woman to later on, use the 'curves' from an adjustment layer to control the brightness and contrast of just the woman. However, after making her brighter, I realised I would like to change her hair back to her original colour 'form' which led me to using the brush  with a colour of black (as the colour black, on the mask, transforms the changes back to its original form). Secondly, I'v learned to use the 'rectangular marquee tool' to easily select the sky, and use the 'hue/saturation' from an adjustment layer to control its colours and saturation. Additionally, if I click on the "master" mode, I could change it to for example the colour "cyans" and wherever there's a blue colour on the image, that's the
Hai..